Saturday, March 28, 2020

Cat Tree

This really does not belong here or in any of the existing blogs so it goes to this as I tore down the green house.

Cat Tree Pictures.  Frame is built from what I had on hand.  2x4 post.  Plywood platforms and OSB platform braces.


Thursday, August 23, 2018

Hardware Reuse

I have just pulled the control board down from the garage which adjoins the greenhouse.  I don't think I've ever included a picture of the WX175.


At this point all I am really interested in is the pressure sensor which plugged into the empty IC socket on the smaller board.  It is a Motorola MPX4115AS or MPX4115AP pressure sensor.  I am unsure because the number on it does not match anything I can find.   Traced down the number by looking at original documentation. https://phanderson.com/wx175/wx175.html


I will be keeping the large board intact for now as it would function as a PIC controller by replace the WX175 chip with an flash based microchip controller.

The wood board will be retained to mount non greenhouse related monitoring and control electronics.

Tuesday, January 29, 2013

Project is over.

The WX175 has been discontinued so it will be impossible for anyone to create one of these.  My wife did not like the greenhouse itself and is building one to suite her tastes.  

If I create another control system it will be with a custom controller.  I will link to it here.

Thursday, December 28, 2006

An old swamp cooler made the greenhouse usable during the summer. The electric oil filed radiator keep the greenhouse warm this winter. Although we insulated on side of the roof the heating bill have become too much so we moved all the plants except water lilies in to the house yesterday.

Saturday, October 28, 2006

Update


Update: The summer is over and once more I am depending on the WX175 to keep plants from freezing.

I have rewritten the GUI in a more OOP style. It now includes a tab-ed pane that allows you to switch between various controls. The code as with the earlier version is MS C#. In time it may be moved to a Linux server using mono the pd C# clone. The red background indicates that the greenhouse heater is on. It would show blue if the cooler was on. In the tab-ed pane there are boxes that indicate how long the heater and/or cooler ran and how much it cost to run. In this case 36 cents. Above the boxes there are ON/OFF buttons which are active when the control program is paused. Click on the image for a larger view.

I have started a project to replace the WX175 with a custom controller. The plan is to have the control logic local to the controller rather then depend on a remote PC. This will make the system more dependable. The PC will still set the program parameters and log information to the database. The local control logic may be limited to a sanity check on received commands and a limp mode program for use when the PC becomes unavailable.

Current plans are to run as much of the automation as possible from one or more 12V auto or deep cycle marine batteries. In the event of a AC power failure this will allow the system to control the more passive things linke vents and shades, and most importantly an alarm.

Saturday, May 06, 2006

Updated Graph


Several days of temperature data. The blue lines that come down from the top indicate the cooling fan is running. The lines that come up from the bottom indicate when the heater is on. I was in the process of working out the heating hystersis (sp?). Ended up at 1 degree (was 5 to start with). The heater is switched on and off more frequently but the temperature only varies by a bit over 1 degree. Sweet.

Friday, April 28, 2006

Door Sensor

It has been raining on and off for the past 24 hours. So far we have about .70 inches. We are quite dry so I hope we get about 2 more inches of gentle rain.

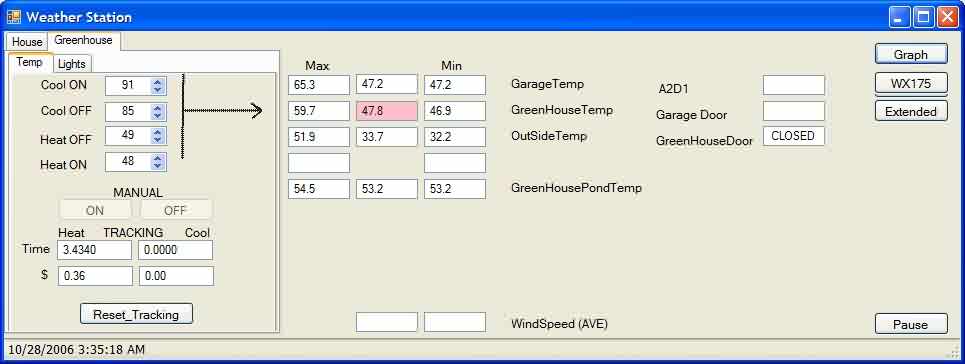
At any rate I figured it was about time to add a sensor to let the system know when the door was open or closed. It would be a bad thing to turn on the fans when the door was closed. It would also be nice if the system could alert me that I needed to open or close the door for temperature control. Yup some things are still quite manual.

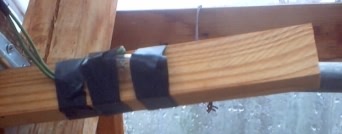
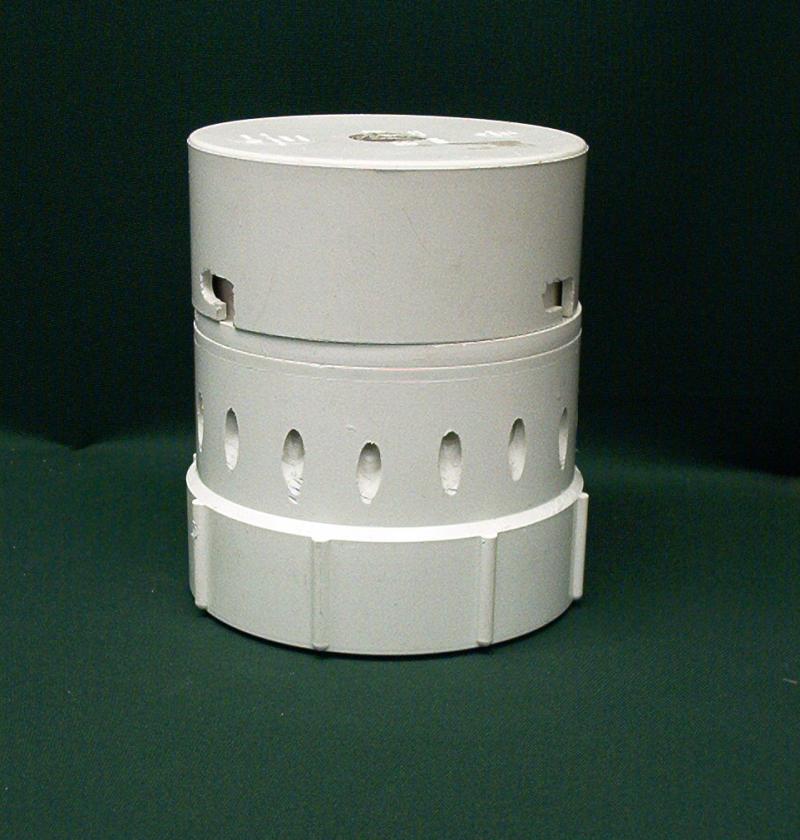
The obvious choice would be to use a reed switch, neither I or the local Radio Shack have one. I was thinking about using a limit switch but the door is a bit sloppy and the switches I have do not look moisture proof. I settled on using an old mercury switch salvaged from a blower fan. These are simple devices. When the mercury cover the contacts the circuit is closed.


The sensor mount is little more then two bits of wood attached to a strap hinge. The switch is attached to one of the sticks with electrical tape.

When the door is opened the heavy end swings down causing the mercury to run away from the contacts.

When the door closes it pushes the sticks in which tilts the mercury switch and contact is made.


The tape is used to position the switch an angle that will cause the desired murcury flow.

That is all.

Wet bulb humidity sensor


Robert Graham describes (with pictures) how to measure humidity with a couple of DS18S20 sensors, a fan and some PVC pipe. Here on the Wet Bulb Humidity page.

This "modern" way requires a humidity sensor and another sensor (DS2438) to meaure voltage and temperature. See this.

A more complex experiment on the subject can be found at Thermistor Psychrometer Lab.


Philip Gladstone's version of a shade. This one is made of plastic bowls costing less then $1 each.